Painting Techniques: Exploring the World of Artistic Expression

painting techniques


Amazon.com do great starter art kits – everything you need to get started in one bundle. Click here to view.

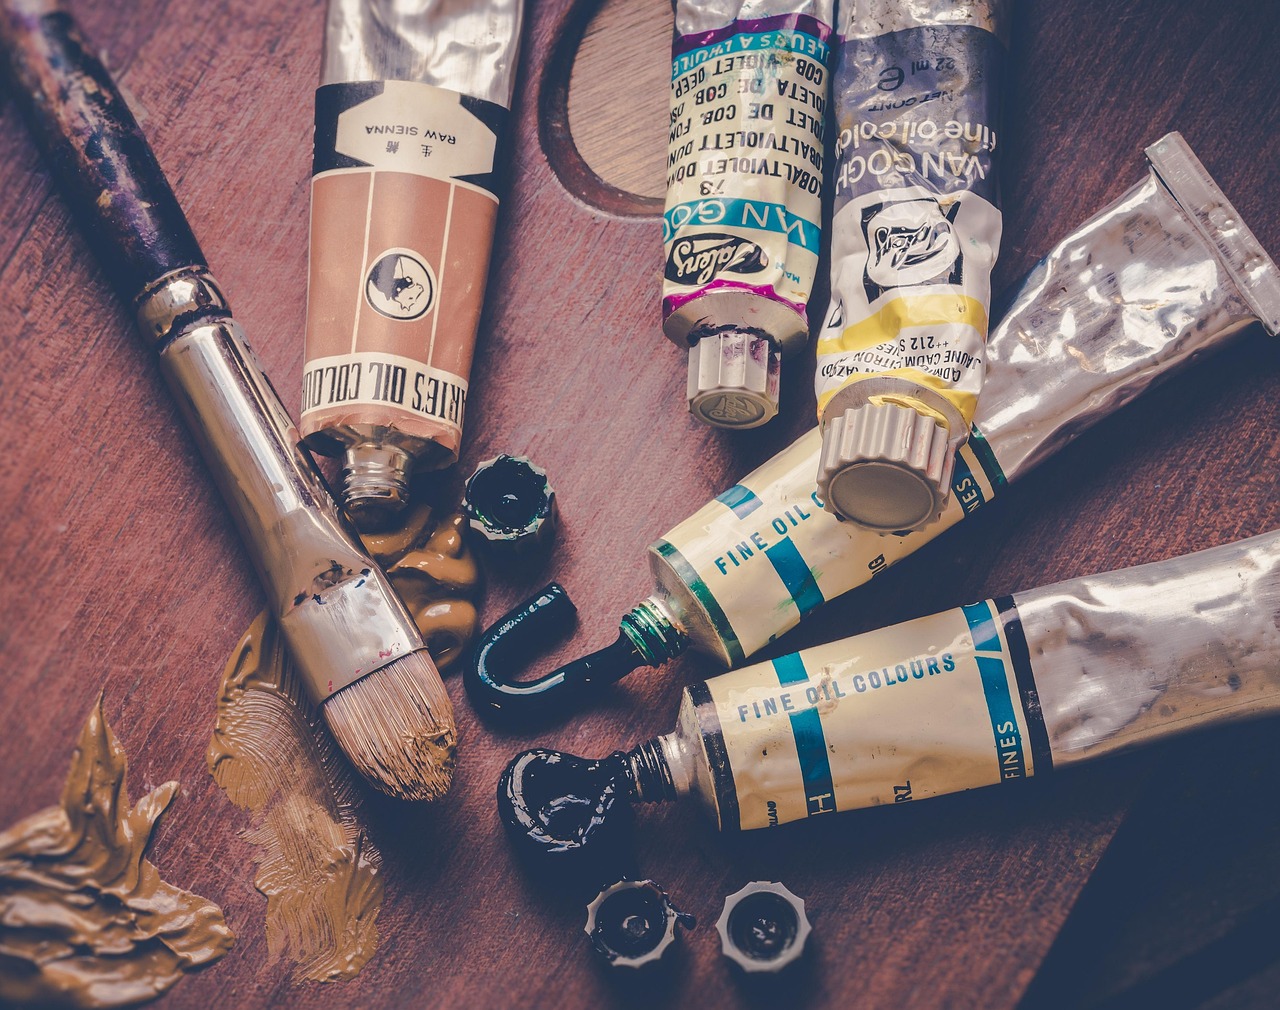
When it comes to expressing creativity, few mediums offer as much variety as painting. From ancient methods to contemporary trends, the world of painting techniques is vast and inspiring.

Whether you’re a beginner looking to experiment or an experienced artist refining your craft, understanding different painting techniques can transform your artistic journey. In this article, we’ll explore a range of methods, including pencil drawings, encaustic art, marbling paint, fresco painting, and impasto painting, to help you discover the style that speaks to you.

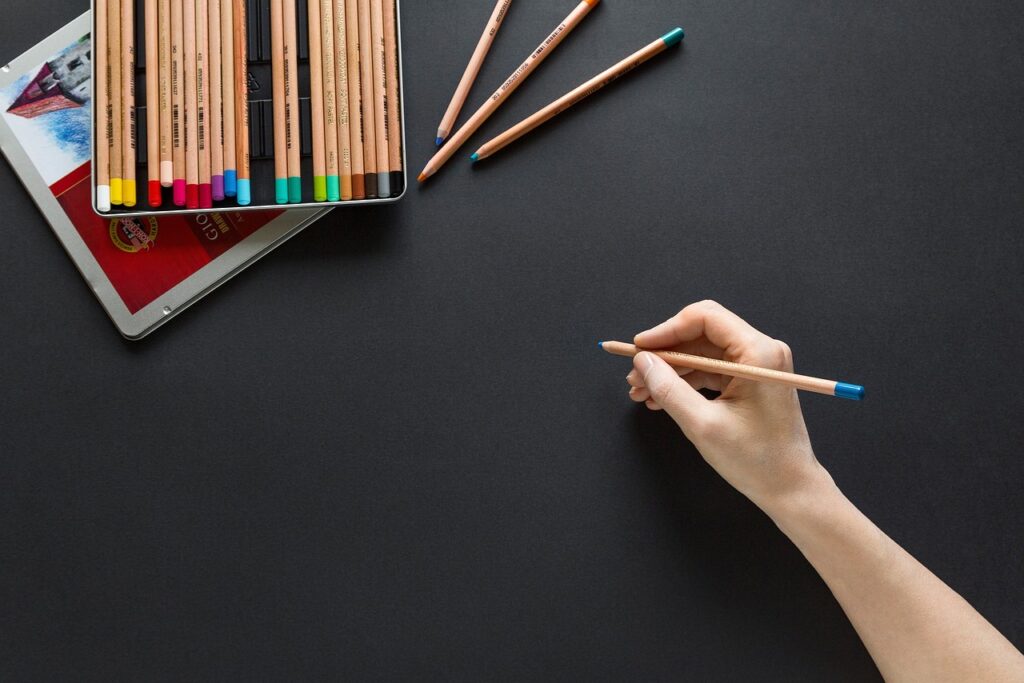
The Foundation: Pencil Drawings as a Starting Point

Before diving into complex painting techniques, many artists begin their journey with pencil drawings. Pencil work is fundamental for sketching compositions, planning paintings, and mastering the basics of light, shadow, and proportion. Pencil drawings allow artists to experiment with shading, line weight, and texture — essential skills that carry over to painting.

Using pencils also helps develop an understanding of how different materials interact. Techniques learned through pencil drawings, such as hatching, cross-hatching, and blending, easily translate to brushwork in painting.

For many, the pencil becomes not just a starting point but an enduring tool for adding fine details and outlines even in completed paintings.

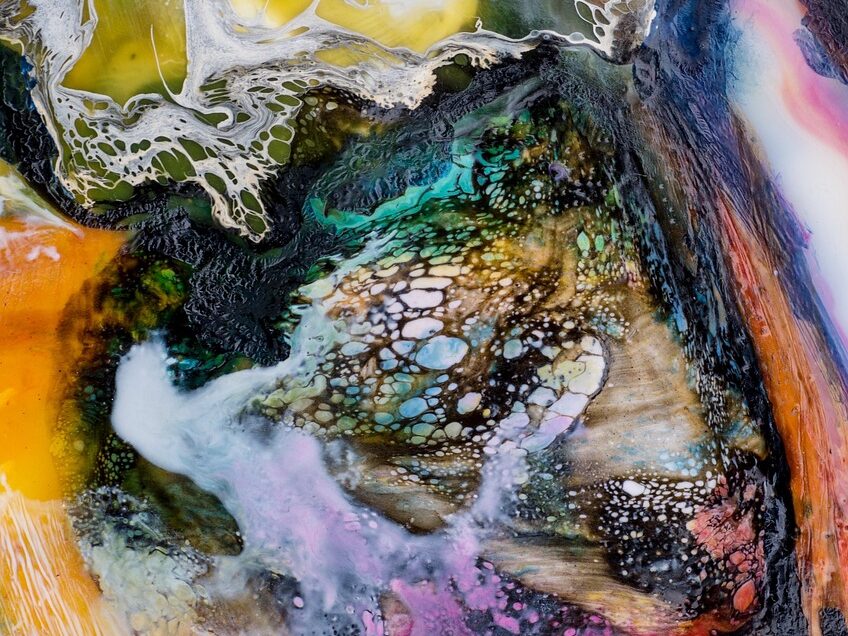
Encaustic Art: Painting with Wax

One of the oldest and most captivating painting techniques is encaustic art, also known as hot wax painting. This method involves heating beeswax and mixing it with colored pigments. The molten wax is then applied to surfaces such as wood or canvas.

What makes encaustic art unique is its luminous quality and incredible texture.

Artists love encaustic art for its versatility. The wax can be layered, carved, or even embedded with materials like fabric or paper, creating depth and dimension. As the wax cools, it hardens, preserving the artwork for generations.

Today, encaustic art continues to evolve, blending traditional methods with modern creativity to produce stunning, tactile masterpieces.

(Encaustic Art: The Complete Guide to Creating Fine Art with Wax)

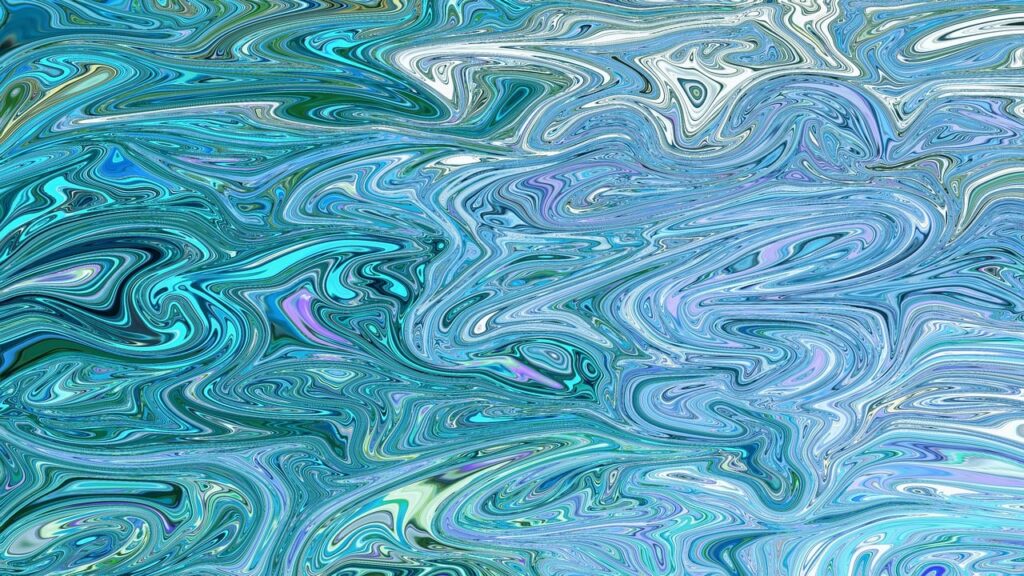
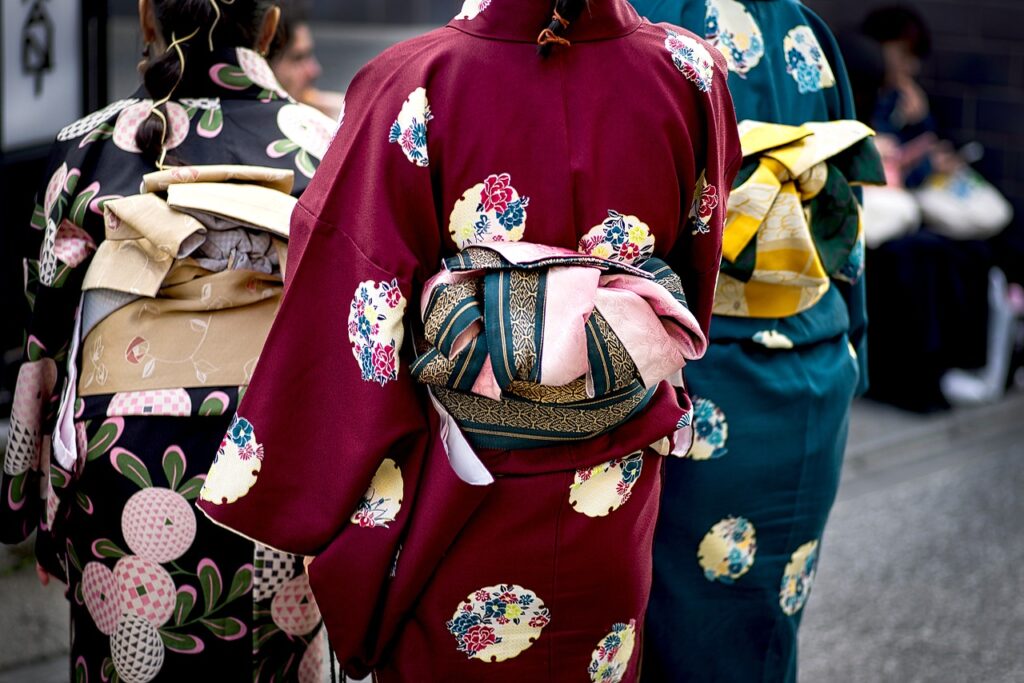
Marbling Paint: Fluid Magic on Water

If you’re drawn to unpredictable and fluid designs, marbling paint is a mesmerizing technique worth exploring. Also known as marbling art, this process involves floating paint on the surface of water and then carefully transferring the design onto paper or fabric.

The result is a one-of-a-kind, swirling pattern that looks almost magical.

Marbling paint has roots in Turkish marbling, or Ebru art, where artists manipulate the floating pigments into intricate, marble-like designs before printing them.

This technique is perfect for creating decorative papers, book covers, and unique backgrounds for other artworks. Because no two marbled designs are the same, this method celebrates spontaneity and creative freedom.

(The Art of Paint Marbling: Tips, techniques, and step-by-step instructions for creating colorful marbled art on paper)

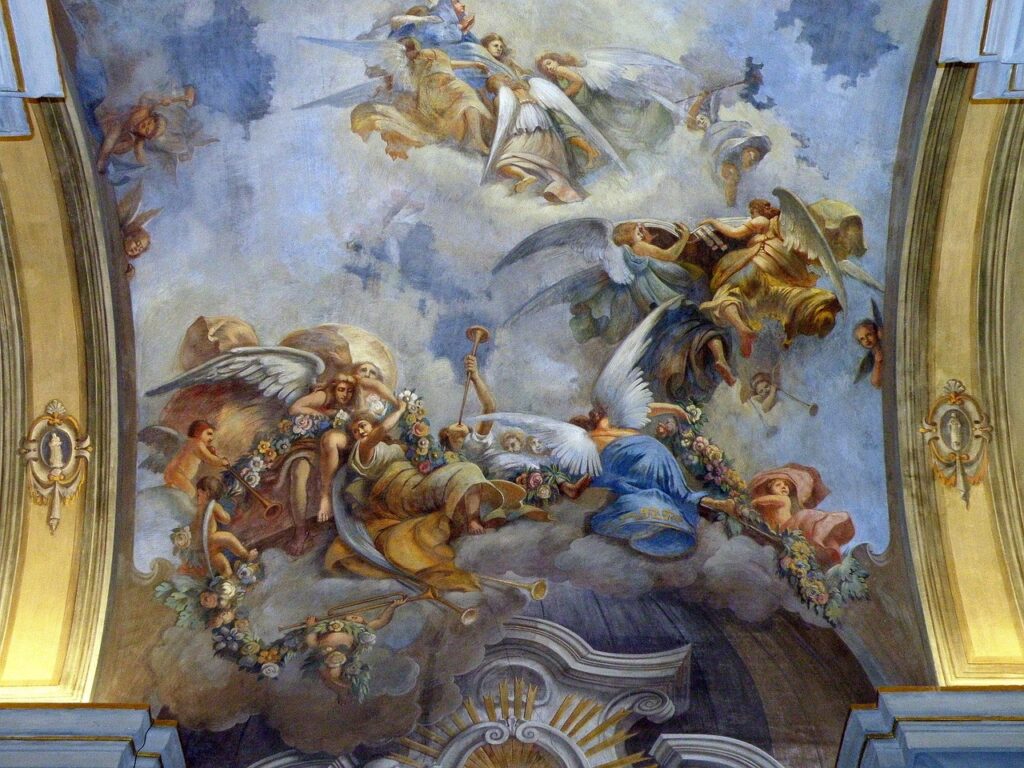
Fresco Painting: A Classic Mural Technique

For those fascinated by historical painting techniques, fresco painting offers a direct connection to the past. Used by Renaissance masters like Michelangelo, fresco involves applying pigment onto freshly laid wet plaster.

As the wall dries, the paint becomes an integral part of the surface, resulting in vibrant, long-lasting murals.

Fresco painting requires precision and speed, as artists must work while the plaster is still damp. However, the rewards are immense — frescoes are known for their durability and brilliant color retention. This technique is ideal for large-scale artworks, especially those intended to endure for centuries in architectural spaces.

(A Manual of Fresco and Encaustic Painting: Containing Ample Instructions)

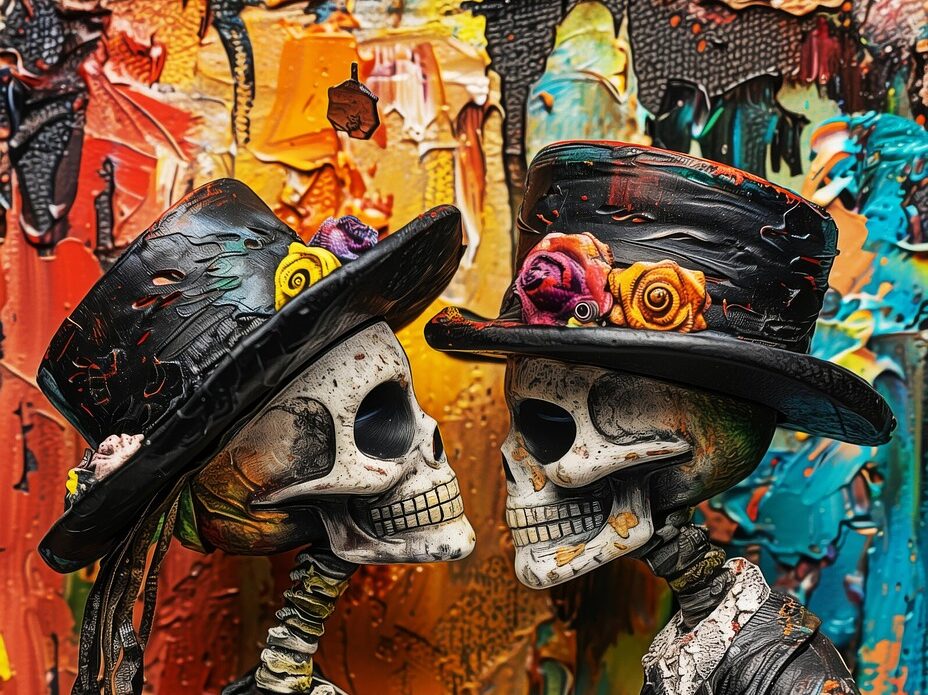
Impasto Painting: Building Texture with Bold Strokes

For artists who love texture and expressive brushwork, impasto painting is a dynamic and energetic technique. Impasto involves applying thick layers of paint, often with a palette knife or heavy brush, so that the brushstrokes themselves become a visible part of the artwork.

With impasto painting, artists can create dramatic shadows and highlights by sculpting the paint on the canvas.

Impasto painting brings a three-dimensional quality to the work, making it feel alive and full of movement. Impasto is especially effective for conveying emotion, energy, and intensity in both abstract and representational pieces.

(Textured Art: Palette knife and impasto painting techniques in acrylic)

The world of painting techniques is as diverse as the artists who practice them. Whether you’re sketching your first pencil drawings, experimenting with the luminous layers of encaustic art, swirling pigments in marbling paint, bringing history to life with fresco painting, or adding bold textures through impasto painting, each method offers its own unique rewards.

Exploring these techniques not only expands your artistic skill set but also deepens your appreciation for the rich history and endless possibilities of visual art.

So pick up your tools, embrace the creative process, and let your next masterpiece begin!

Amazon.com do great starter art kits – everything you need to get started in one bundle. Click here to view.

Pencil Drawing: The Simplicity of Pencil Art

Pencil Art


Amazon.com do great starter art kits – everything you need to get started in one bundle. Click here to view.

Pencil drawing remains one of the most accessible yet profound forms of artistic expression. Whether you’re a seasoned artist or just picking up a sketchbook for the first time, the simple pencil offers endless creative potential.

From fine details to bold, dramatic shading, pencil art has a unique way of capturing the beauty of both everyday life and imaginative scenes. Using the right tools, such as charcoal pencils and shading pencils, can transform a basic sketch into a captivating piece of pencil artwork.

The Timeless Appeal of Pencil Art

Pencil drawing has been cherished for centuries. The versatility of pencil art allows artists to create everything from quick sketches to highly detailed portraits. One of the great appeals of pencil art is its simplicity — with just paper and a pencil, you can start creating.

For beginners, starting with pencil drawing simple techniques such as basic shapes, lines, and shading builds a strong foundation.

Unlike other mediums that require extensive setups or drying times, pencil drawing offers immediate results. Whether you’re capturing the soft folds of fabric, the intricate details of a landscape, or the subtle expressions of a face, the pencil provides precision and control.

(106 Pack Sketching Supplies, Art Supplies Include Graphite Colored Charcoal Watercolor & Metallic Pencils, Sketching Kit with 3-Color Sketchbook & Coloring Book, Gift Case for Kids Teens Adults)

Exploring the Tools: Charcoal Pencils and Shading Pencils

To elevate your pencil artwork, using the right tools is essential. While standard graphite pencils are excellent for clean lines and delicate shading, charcoal pencils add a rich, velvety texture that brings dramatic depth to your drawings.

Charcoal pencils are perfect for expressive sketches and bold contrasts, making them a favorite for figure drawing and portraits.

On the other hand, shading pencils come in a range of hardness levels, from soft (dark) to hard (light). Using a variety of shading pencils allows artists to build gradients and layers, giving their pencil artwork a more lifelike and dimensional appearance.

Blending techniques, such as smudging with a tortillon or blending stump, can enhance transitions between light and shadow, adding realism to your drawings.

Combining both charcoal pencils and shading pencils in your work provides endless possibilities. You can achieve delicate, light-filled areas and deep, moody shadows within the same piece, creating dynamic and visually striking results.

(Artists Charcoal Drawing Set | 24-piece Gift Tin Set | The Ideal Starter Set)

Pencil Drawing Simple: Starting with the Basics

For beginners, focusing on pencil drawing simple subjects is the best way to build skills. Start with everyday objects like fruit, cups, or flowers. These simple forms help you practice observation, proportion, and basic shading techniques.

Learning how light interacts with an object is crucial in pencil art. Use shading pencils to experiment with highlights and shadows, and observe how different pencil grades affect your drawing’s tone and texture.

Practicing gradient scales is also helpful — this teaches you how to transition smoothly from light to dark, a fundamental skill for all pencil artists.

(U.S. Art Supply 50 Piece Adult Coloring Book Artist Grade Colored Pencil Set with 4 Styles of Sketching & Drawing Paper – Sketching Shading Blending, Students Adults Beginners)

Techniques to Enhance Your Pencil Artwork

Mastering a few essential techniques can take your pencil artwork to the next level:

  1. Hatching and Cross-Hatching: Use parallel or intersecting lines to build up tone and texture.
  2. Blending: Smooth out pencil strokes using a blending stump or tissue for softer transitions.
  3. Layering: Gradually build layers of graphite or charcoal to achieve depth and complexity.
  4. Eraser Techniques: Use kneaded erasers not just for corrections but to lift graphite and create highlights.
  5. Contrast and Composition: Balance dark and light areas to guide the viewer’s eye and enhance your composition.

These techniques apply whether you’re working on pencil drawing simple exercises or developing more advanced pencil artwork.

The Enduring Beauty of Pencil Art

Pencil art continues to thrive in the modern art world. From quick urban sketches to hyper-realistic portraits, the possibilities are truly limitless. Whether you’re using soft charcoal pencils for bold drama or fine shading pencils for delicate details, pencil drawing offers an expressive and rewarding creative outlet.

Moreover, pencil drawing is perfect for artists of all skill levels. It’s a portable, affordable, and endlessly adaptable medium.

With practice, even the simplest sketches evolve into stunning pencil artwork that reflects your unique style and vision.

In a world of digital design and fast-paced visuals, pencil art stands as a testament to the enduring power of simplicity and skill. Whether you’re just starting with pencil drawing simple sketches or diving into complex, layered pencil artwork, this classic medium offers endless opportunities for growth and expression.

Explore the depth of charcoal pencils, experiment with shading pencils, and let your creativity flow freely on the page. Your next masterpiece is just a pencil and piece of paper away!

Amazon.com do great starter art kits – everything you need to get started in one bundle. Click here to view.

Encaustic Art: The Timeless Beauty of Painting with Wax

Encaustic Art

Amazon.com do great starter art kits – everything you need to get started in one bundle. Click here to view.

Encaustic art, an ancient painting technique that uses heated beeswax mixed with colored pigments, is enjoying a well-deserved resurgence. Encaustic wax painting offers a depth, texture, and luminosity that few other mediums can match.

Whether you are an experienced painter or just beginning your artistic journey, exploring the encaustic medium opens a world of creative possibilities.

What is Encaustic Art?

Derived from the Greek word “enkaustikos,” meaning “to burn in,” encaustic art involves fusing layers of wax with heat.

This method dates back over 2,000 years, with some of the earliest examples found in the Fayum mummy portraits of ancient Egypt. These timeless works still captivate viewers today, showcasing the durability and beauty of encaustic artwork.

In a typical encaustic wax painting, the artist melts beeswax and adds pigments to create vibrant colors. The molten wax is then brushed, poured, or sculpted onto a surface like wood, canvas, or even ceramics.

Each layer is reheated to bond with the layer beneath, creating a rich, textured finish that brings incredible depth to the artwork.

(Encaustic Art The Original -Encaustic Starter Kit -Includes Painting Iron, Basic Wax Blocks Set, Cards, & Scribing Tool-Encaustic Painting Supplies)

Why Artists Love the Encaustic Medium

For the modern encaustic artist, this medium offers unparalleled versatility. The wax can be carved, scraped, polished, or even embedded with objects like fabric, paper, or found materials. Unlike traditional paint, encaustic doesn’t dry by evaporation — it solidifies as it cools, allowing artists to work at their own pace and revisit areas of the painting without worrying about drying time.

One of the standout features of the encaustic medium is its ability to create a luminous, almost sculptural effect. Light penetrates the translucent layers of wax, giving encaustic artwork a unique glow and depth that is difficult to achieve with oils or acrylics.

This makes encaustic art especially popular for abstract compositions, landscapes, and mixed-media projects.

The Tools and Materials of Encaustic Wax Painting

Becoming an encaustic artist doesn’t require an extensive array of tools, but investing in quality materials is essential for the best results.

At the core of encaustic wax painting is beeswax, often combined with damar resin to increase hardness and durability. Pigments are then added to achieve the desired color palette.

Artists typically use heated palettes to keep the wax at the perfect temperature, along with natural-bristle brushes that can withstand the heat. Heat guns, torches, and irons are commonly used to fuse layers together, while metal tools and scrapers help to shape and texture the wax.

Safety is also important when working with the encaustic medium. Proper ventilation is crucial, as is maintaining a consistent temperature to prevent the wax from overheating.

With the right setup, artists can enjoy hours of creative exploration in a safe and inspiring environment.

(The Original: Art Stylus Pro with Interchangeable Tips (Standard Drawing, Brush Head, Rectangular Shape) for Low-Heat Encaustic Painting – Ideal for Artists, Teachers, Parents, Crafters)

Exploring the Creative Possibilities of Encaustic Artwork

One of the most exciting aspects of encaustic art is its limitless creative potential. The tactile nature of encaustic wax painting encourages experimentation. Artists can build up thick, sculptural layers or scrape back to reveal hidden colors beneath. Incorporating collage elements or adding textured materials creates a dynamic, multidimensional effect.

Many contemporary encaustic artists blend photography with wax to create ethereal, dreamlike images. By layering photographs with translucent wax, they achieve a soft focus and depth that feels almost otherworldly.

Others use the medium to craft abstract designs that emphasize movement, color blending, and surface texture.

The encaustic artist is free to push the boundaries of tradition, combining ancient techniques with modern innovations to produce stunning encaustic artwork that resonates with today’s audiences.

Encaustic art is more than just a painting technique — it’s an invitation to explore creativity in its most tactile and luminous form. With its rich history, hands-on process, and breathtaking results, encaustic wax painting continues to inspire artists around the world.

Whether you’re drawn to the sculptural textures, the vibrant colors, or the sheer versatility of the encaustic medium, this art form offers endless opportunities for expression.

For those ready to embrace the ancient yet modern allure of encaustic art, now is the perfect time to pick up your tools and let the wax guide your creativity.

Become an encaustic artist and transform molten wax into captivating, lasting masterpieces.


Amazon.com do great starter art kits – everything you need to get started in one bundle. Click here to view.

Marbling Paint: Discover the Magic of Water Marbling Art

Marbling Paint

Amazon.com do great starter art kits – everything you need to get started in one bundle. Click here to view.

Marbling paint has captured the imaginations of artists and hobbyists around the world. With its swirling patterns and mesmerizing colors, marbling is both a traditional and modern art form.

Whether you’re a beginner or an experienced artist, exploring the beauty of water marbling paint can unlock endless creative possibilities. This technique, also known as Turkish marbling or Ebru art, transforms simple materials into stunning masterpieces.

What is Marbling Paint?

At its core, marbling paint is a special type of paint designed to float on the surface of water or a thickened water-based medium. Unlike regular paints, which sink, marbling paint stays on top, allowing artists to create intricate, flowing patterns.

These designs are then carefully transferred onto paper, fabric, wood, or even ceramics. The process of using paint for water marbling offers a unique, unpredictable effect that makes every piece one-of-a-kind.

(Making Marbled Paper: Paint Techniques & Patterns for Classic & Modern Marbleizing on Paper & Silk)

The Ancient Origins of Ebru Art

Marbling has a rich history, with Turkish marbling (or Ebru art) standing out as one of the most celebrated traditional forms.

Originating in Central Asia and perfected by Ottoman artists, Ebru art was traditionally used to decorate books, calligraphy borders, and official documents. Today, it continues to be a symbol of cultural heritage and artistic expression in Turkey and beyond.

Using water marbling paint in Ebru art involves floating pigments on water thickened with carrageenan or other natural gelling agents.

Artists then use combs, styluses, or brushes to manipulate the colors into stunning patterns such as flowers, feathers, or abstract waves before carefully placing the paper to capture the image.

(Water Marbling Paint Kit)

The Magic of Marbling: Modern Magic Marbling Art

As marbling techniques have spread globally, contemporary artists have reimagined the practice in fresh, exciting ways. Known as magic marbling art, this modern approach blends traditional methods with bold, experimental designs.

Artists often use vibrant water marbling paint to create modern masterpieces that are used for home décor, fashion items, or even digital artworks.

One of the most appealing aspects of magic marbling art is its unpredictability. Even with careful planning, the water’s movement and the paint’s behavior create spontaneous patterns, adding a touch of magic to every project.

Whether you’re crafting personalized stationery or designing custom textiles, magic marbling art brings a sense of wonder and uniqueness to your creations.

Choosing the Right Paint for Water Marbling

If you’re ready to dive into this captivating art form, selecting the right paint for water marbling is essential. High-quality marbling paints are specially formulated to float and spread beautifully on the water’s surface. They come in a variety of vivid colors that remain vibrant after drying, making your artwork stand out.

When shopping for marbling paint, consider starter kits that include everything you need: paints, thickening agents, droppers, and sometimes even combs or styluses.

Many artists recommend starting with a set of water marbling paints designed for beginners, which will give you a range of colors and tools to practice your techniques.

(Contemporary Paper Marbling: Design and Technique)

Tips for Successful Marbling

Whether you’re exploring Turkish marbling, experimenting with magic marbling art, or simply curious about water marbling paint, here are some helpful tips:

  1. Prepare Your Water Medium Properly: Use the right thickening agent to create the perfect surface tension for the paint.
  2. Use Quality Marbling Paint: Regular craft paints won’t float properly. Always opt for paint specifically designed for water marbling.
  3. Work in a Dust-Free Environment: Dust or debris can disrupt the delicate paint patterns.
  4. Experiment with Tools: Combs, brushes, and styluses allow you to create intricate designs and manipulate the paint to your liking.
  5. Be Patient and Practice: Like any art form, marbling takes practice. Experiment with color combinations and patterns to develop your unique style.

Marbling paint opens up a world of creativity, blending history and innovation into a truly magical art form. Whether you’re inspired by the centuries-old tradition of Ebru art, intrigued by the allure of magic marbling art, or simply looking for an exciting new hobby, exploring water marbling paint techniques is sure to spark your imagination.

With the right paint for water marbling and a little practice, you can create captivating, fluid designs that capture the beauty and spontaneity of this timeless art.

Amazon.com do great starter art kits – everything you need to get started in one bundle. Click here to view.

Fresco Painting: The Timeless Art of Painting on Plaster

Amazon.com do great starter art kits – everything you need to get started in one bundle. Click here to view.

Fresco painting is one of the most enduring and celebrated art forms in human history. From the ancient ruins of Pompeii to the towering ceilings of the Sistine Chapel, frescoes have captured the imagination of viewers for centuries. This distinctive method involves applying pigment to freshly laid plaster, allowing the colours to become an integral part of the wall itself.

Fresco painting doesn’t just adorn surfaces — it transforms them into vibrant, lasting masterpieces.

Let’s explore the fascinating history of frescoes, the techniques behind fresco painting, and what it takes to become a fresco artist today.

The Origins and Evolution of Frescoes

The history of frescoes stretches back thousands of years. Some of the earliest known examples come from the Minoan civilization in Crete, around 1500 BCE. These early frescoes depicted lively scenes of nature, animals, and rituals, offering a glimpse into the culture and daily life of the time.

The technique flourished in Ancient Rome, where frescoes adorned villas and public buildings alike. Vibrant frescoes artwork from Pompeii and Herculaneum still astonishes visitors with its detail and colour, preserved remarkably well under layers of volcanic ash.

However, it was during the Italian Renaissance that fresco painting reached its peak. Masters like Michelangelo, Raphael, and Giotto elevated the art form, creating monumental frescoes that remain cultural treasures today.

Michelangelo’s ceiling in the Sistine Chapel is perhaps the most famous fresco artwork in the world, demonstrating the incredible potential of this medium to convey drama, beauty, and spiritual grandeur.

The Fresco Painting Technique

What makes fresco painting so unique is its reliance on chemistry and timing. The term “fresco” itself comes from the Italian word affresco, meaning “fresh,” referring to the fresh plaster surface that is crucial for this technique.

Here’s how it works:

  • A wall is coated with a layer of wet lime plaster.
  • While the plaster is still damp, pigments mixed with water are applied directly onto the surface.
  • As the plaster dries, a chemical reaction causes the pigments to become permanently embedded in the wall.

This method is known as buon fresco (true fresco). There’s also fresco secco (dry fresco), where artists paint onto dry plaster, though this version is less durable over time.

Because of the drying time, a fresco artist must work efficiently and plan meticulously. Walls are prepared in sections, known as giornate (Italian for “a day’s work”), with each section designed to be completed in a single day. This careful planning ensures consistency in colour and composition across the entire frescoes artwork.

(A Manual of Fresco and Encaustic Painting)

Becoming a Fresco Artist

For those inspired to become a fresco artist, dedication and patience are key. Fresco painting is not just about artistry; it requires an understanding of materials, wall preparation, and timing. Many contemporary artists still study traditional fresco techniques to keep this historic practice alive, often attending specialized workshops or learning under master artisans.

Modern fresco artists continue to explore new themes while respecting the old techniques, blending tradition with innovation. They use both historical methods and updated materials to create frescoes artwork that adorns public spaces, churches, and even private homes.

The Lasting Impact of Frescoes Artwork

One of the most remarkable aspects of frescoes is their longevity. Unlike canvas paintings that can fade or deteriorate, frescoes become part of the architectural structure itself. This durability is why we can still admire frescoes from ancient times, their colours and details remarkably well-preserved.

Fresco painting also holds a special place in the history of storytelling through art. Frescoes artwork has been used to depict religious narratives, historical events, and mythological tales, serving as visual records of culture and belief.

Walking through a space adorned with frescoes is like stepping into a living history book, where every brushstroke tells a story.

(Florence: The Paintings & Frescoes, 1250-1743)

Fresco painting is a testament to the enduring power of art and human creativity. From the sun-soaked walls of ancient villas to the awe-inspiring ceilings of Renaissance cathedrals, frescoes continue to captivate audiences with their beauty and craftsmanship.

For the dedicated fresco artist, this technique offers a unique opportunity to create lasting masterpieces that stand the test of time. Whether you’re an admirer of historic frescoes artwork or inspired to try your hand at this ancient craft, fresco painting invites you to become part of a tradition that spans centuries.

So next time you gaze upon a fresco, take a moment to appreciate not just the beauty of the image, but the incredible skill and history behind it!


Amazon.com do great starter art kits – everything you need to get started in one bundle. Click here to view.

Impasto Painting: Bringing Texture and Life to the Canvas

Amazon.com do great starter art kits – everything you need to get started in one bundle. Click here to view.

Impasto painting is a bold and expressive style that captivates viewers with its dynamic textures and striking depth.

Unlike smoother painting methods, the impasto technique involves applying thick layers of paint to the canvas, so that the brushstrokes or palette knife marks remain visible.

This tactile quality gives impasto artwork a lively, almost sculptural presence that has fascinated artists and art lovers for centuries.

Whether you’re an aspiring impasto artist or just curious about this distinctive style, let’s explore the fascinating world of impasto painting, its history, techniques, and how you can experiment with it yourself.

What is Impasto Painting?

The term “impasto” comes from the Italian word meaning “to paste” or “to knead,” which perfectly describes the thick, textured application of paint in this style.

Some people might playfully refer to it as “im pasto,” and while the pronunciation might vary, the impact of the style is universally powerful.

In impasto painting, artists use a generous amount of paint—usually oil or acrylic—to build up a surface that catches the light and creates dramatic shadows. This not only adds a three-dimensional quality to the work but also enhances the emotional intensity of the subject.

The impasto technique turns the brushstroke itself into part of the visual narrative, adding movement and energy to the artwork.

(Textured Art: Palette knife and impasto painting techniques in acrylic)

A Brief History of the Impasto Technique

The impasto technique has deep roots in the history of art. Baroque masters like Rembrandt used thick layers of paint to emphasize light and texture, especially in his portraits. The raised surfaces of his paintings highlighted facial features and fabrics, bringing them vividly to life.

Later, in the 19th century, the technique found new champions in the Impressionists and Post-Impressionists. Vincent van Gogh, perhaps the most famous impasto artist, used swirling, thick strokes of paint to express his emotional state and convey the vitality of nature.

His iconic works like Starry Night and Sunflowers are brilliant examples of impasto artwork, where the paint’s physicality enhances the power of the imagery.

Today, contemporary artists continue to explore and push the boundaries of impasto, using modern materials and tools to create stunning, textured masterpieces.

(25pcs Impasto Set, Fuumuui Acrylic Paint Brushes, Professional Artist Series with Wide Flat, Filbert, Fan, Dagger, Cat Tongue, Round, Angle, Rigger for Oil, Acrylic Canvas Paintings)

Tools and Materials for Impasto Artwork

To create impasto artwork, you’ll need a few key supplies:

  • Heavy-body acrylic or oil paints: These thicker paints hold their shape well and are ideal for creating raised textures.
  • Palette knives: Essential for spreading and sculpting paint directly on the canvas.
  • Stiff brushes: Strong bristles help apply thick paint and create visible brushstrokes.
  • Impasto mediums: If you’re using acrylics, you can add special mediums to thicken the paint even further.

Canvas or wood panels are recommended surfaces, as they can support the weight of the heavy paint without warping.

How to Use the Impasto Technique

The beauty of the impasto technique lies in its freedom and expressiveness. Here’s a simple way to get started:

  1. Plan Your Composition: Sketch a rough outline of your subject. Flowers, landscapes, and abstract designs work beautifully with impasto.
  2. Layer Generously: Use your palette knife or brush to apply thick, bold layers of paint. Don’t be afraid to load your tool with colour—it’s all about texture!
  3. Play with Direction: Vary the direction of your strokes to create movement. Swirling motions can suggest energy, while straight lines can add structure.
  4. Build Dimension: Layer different colours and textures to create depth. The impasto technique allows colours to mix directly on the canvas for spontaneous effects.
  5. Let It Dry Fully: Thick paint takes time to dry, especially oil paint. Allow several days for your impasto artwork to set completely.

Why Artists Love Impasto Painting

For many impasto artists, the appeal of this technique lies in its physicality and spontaneity. Unlike more delicate painting styles, impasto invites bold experimentation. It’s a fantastic way to express emotion and movement, as every mark made by the brush or knife becomes a permanent, tactile element of the composition.

(V-inspire Abstract Floral Oil Painting, Hand-Painted Canvas Wall Art, 28 x 40 inches, Colorful Forest Landscape)

Moreover, impasto paintings interact beautifully with light. As light hits the raised surfaces, it creates natural highlights and shadows, making the artwork come alive from different angles

Impasto painting is a vibrant and exhilarating art form that continues to inspire artists across the world. Whether you’re an established impasto artist or someone exploring “im pasto” techniques for the first time, this textured style offers endless possibilities for creativity.

By embracing the impasto technique, you can add depth, emotion, and drama to your canvases, turning ordinary subjects into extraordinary works of art.

So, gather your brushes, palette knives, and heavy-bodied paints, and dive into the world of impasto artwork. Let your creativity take shape—literally—and watch as your canvas transforms into a vivid, textured masterpiece.

Amazon.com do great starter art kits – everything you need to get started in one bundle. Click here to view.

Silk Painting: Exploring the Art of Painting on Silk Cloth

silk painting

Amazon.com do great starter art kits – everything you need to get started in one bundle. Click here to view.

Silk painting is an ancient and elegant art form that combines the natural beauty of silk with the vivid brilliance of colourful paints.

Across cultures and generations, artists have explored the delicate dance between fabric and pigment, turning plain silk into breathtaking works of art.

Whether you’re admiring the intricate details of Japanese silk paintings or trying your hand at modern designs, the allure of painting on silk cloth continues to captivate creators worldwide.

Let’s explore the techniques, materials, and history of silk painting, along with the rise of related arts like silkscreen paintings.

The Rich History of Silk Painting

Silk has been a prized material for thousands of years, valued for its lustrous texture and luxurious feel. Naturally, artists saw the potential in combining this fabric with their creativity. Some of the earliest known examples of silk painting come from China, where artisans used natural dyes to illustrate landscapes, myths, and everyday scenes on silk scrolls.

Japanese silk paintings also have a distinguished history, often depicting serene nature scenes, delicate cherry blossoms, and graceful cranes. These artworks are renowned for their fine brushwork and subtle use of colour, embodying the harmony and balance celebrated in Japanese aesthetics.

Traditional techniques are still practised today, with master artists passing down their knowledge through generations.

(The Fine Art of Painting on Silk: Inspiring Methods and Techniques for Beginners and Expert-Level Artists)

Essential Materials: Choosing Silk Fabric Paint

When it comes to painting on silk cloth, choosing the right materials is crucial for achieving vibrant, lasting results. The first essential is a high-quality silk fabric paint. Unlike standard fabric paints, silk-specific paints are formulated to flow smoothly across the fabric’s fine fibres, maintaining the silk’s natural softness and sheen.

There are two main types of silk fabric paint: dye-based paints and pigment-based paints.

Dye-based paints penetrate the fibres deeply, creating bright, translucent colours that feel like part of the fabric.

Pigment-based paints sit more on the surface, offering bolder coverage and allowing for more textured effects. Both have their place, depending on the desired outcome of your artwork.

Other essential materials include:

  • Resist or gutta: Used to outline designs and prevent colours from bleeding into each other.
  • Stretching frame: Keeps the silk taut while you work, ensuring clean lines and smooth application.
  • Soft brushes: These allow for gentle, controlled strokes that respect the delicate nature of the silk.

Techniques for Painting on Silk Cloth

Silk painting shares similarities with watercolour art, as both rely on the fluid movement of paint. One popular method is the serti (or resist) technique, where artists draw outlines with resist to contain the silk fabric paint within specific areas. This creates clear, crisp designs and is excellent for patterns like flowers or geometric motifs.

Another approach is free-flow painting, which embraces the unpredictable beauty of wet paint on silk. Without resist barriers, colours blend and flow together organically, producing dreamy, abstract effects.

Layering is also important when painting on silk cloth. Start with lighter shades, allowing each layer to dry before adding deeper tones. This builds depth and richness without overwhelming the delicate fabric.

(Silk Painting: Creating One-of-a-Kind Scarves)

The Influence of Silkscreen Paintings

While silk painting traditionally involves direct application of paint to fabric, the development of silkscreen paintings brought a new dimension to the art. Silkscreen, or screen printing, uses a mesh screen (often made of silk in earlier times) to transfer ink onto various surfaces, including fabric, paper, and even wood.

Silkscreen paintings allow artists to reproduce intricate designs with precision and consistency, making the technique popular in both fine art and commercial applications. Though it differs from hand-painted silk art, silkscreen shares the same appreciation for silk’s fine texture and has contributed to the popularity of silk-based artworks worldwide.

Why Try Silk Painting?

Silk painting offers a unique blend of challenge and reward. The process requires patience and practice, but the results are truly stunning. Watching silk fabric paint spread across the shimmering surface, or seeing the delicate lines of Japanese silk paintings come to life under your brush, is an experience unlike any other.

For beginners, starting with simple designs and practising resist techniques can help build confidence. Over time, you can experiment with free-flow methods and even explore blending traditional silk painting with silkscreen paintings for a modern twist.

(4PCS/Set Wall Scroll Hanging Painting Decor Japanese Koi Fish Flower Fengshui, Ancient Paintings Replica Asia Traditional Art, Attract Wealth Four Seasons)

Silk painting is a timeless art that continues to inspire artists around the globe. From the elegance of Japanese silk paintings to the vibrant experimentation of contemporary silkscreen paintings, this creative practice celebrates both tradition and innovation. By choosing the right silk fabric paint and mastering the techniques of painting on silk cloth, anyone can bring their visions to life on this luxurious canvas.

So why not pick up a brush and let your creativity flow across silk’s shimmering surface?

Whether you’re crafting a decorative piece, a wearable accessory, or simply enjoying the meditative process, silk painting offers endless possibilities for artistic expression.

Amazon.com do great starter art kits – everything you need to get started in one bundle. Click here to view.

Watercolor Painting for Beginners: A Step-by-Step Guide to Unlock Your Creativity

Watercolor Painting for Beginners

Amazon.com do great starter art kits – everything you need to get started in one bundle. Click here to view.

Watercolor painting has a timeless charm that attracts artists of all skill levels. For those just starting out, it might feel a little daunting, but the beauty of watercolour is in its fluidity and unpredictability.

With the right guidance, beginner water color paintings can quickly transform from simple experiments to beautiful works of art.

Whether you’re looking to explore water color art for beginners as a hobby or as a serious creative pursuit, this guide will help you learn watercolor painting in an approachable, step-by-step way.

Why Choose Watercolour Painting?

Watercolor painting offers a unique experience compared to other mediums. Its transparent layers and the way colours blend seamlessly give artworks a light, almost magical quality.

For beginners, it’s an especially rewarding medium because even simple techniques can produce stunning results. Plus, watercolors are relatively affordable and easy to set up, making them perfect for those just starting their creative journey.

If you’ve always admired delicate floral paintings, soft landscapes, or expressive abstract art, you’ll be pleased to know that water color art for beginners covers all these styles and more.

(Painting in Watercolor: The Indispensable Guide)

Materials You’ll Need to Get Started

Before diving into watercolor painting for beginners step by step, it’s important to gather the basic supplies:

  • Watercolor Paints: Start with a simple set of primary colours (red, yellow, and blue). You can mix these to create a wide range of hues.
  • Brushes: Invest in a few round brushes of different sizes. These are versatile and ideal for both broad washes and fine details.
  • Watercolor Paper: Use thick, textured paper specifically designed for watercolors. Regular paper will buckle and tear when wet.
  • Palette and Water Jars: A palette for mixing colours and at least two jars of clean water—one for rinsing and one for clean washes.

Having these essentials on hand will ensure you’re ready to follow along and enjoy your learning process.

(168 Colors Premium Watercolor Paint Set, Equipped with Detail Paint Brush, Art Supplies, for Artists& Paiting Lovers)

Watercolor Painting for Beginners Step by Step

Now let’s walk through some simple steps to create your first beginner water color paintings.

Step 1: Start with Basic Washes

Practice flat washes by loading your brush with diluted paint and applying it evenly across the paper. Then try a gradient wash, where you gradually add more water as you move down the page. These exercises help you understand paint flow and brush control.

Step 2: Explore Wet-on-Wet and Wet-on-Dry Techniques

In wet-on-wet, you apply paint to damp paper, which causes the colours to spread and blend naturally. It’s great for backgrounds or dreamy effects. In wet-on-dry, you paint on dry paper for sharper, more defined edges. Practising both will add variety to your beginner water color paintings.

Step 3: Experiment with Colour Mixing

One of the joys of watercolor painting is discovering new colours by mixing your paints. Try blending two primary colors to see what secondary shades you can create. This will enhance your understanding of color theory and give you a more vibrant palette.

Step 4: Add Simple Details

Once your base layers are dry, use a smaller brush to add details. Even in water color art for beginners, small touches like leaves on trees or veins in petals can bring your painting to life.

Step 5: Learn to Layer

Layering involves painting one color, letting it dry, and then adding another layer on top. This technique adds depth and dimension to your work, transforming flat images into dynamic compositions.

(The Figure in Watercolor: Simple, Fast, and Focused)

Tips for Success

  • Be Patient: Watercolor requires drying time between layers. Rushing can lead to muddy colours.
  • Embrace Mistakes: Some of the most beautiful effects in watercolor come from happy accidents. Let the paint flow!
  • Practice Regularly: Like any skill, consistency is key. Set aside a little time each week to practise.

Watercolor painting for beginners step by step is a journey filled with discovery and joy. With simple tools and a willingness to experiment, anyone can enjoy the relaxing and rewarding process of creating art. Whether you’re aiming to create peaceful landscapes, colourful abstracts, or delicate florals, beginner water color paintings offer endless opportunities to express yourself.

Remember, water color art for beginners doesn’t have to be perfect. Focus on enjoying the process and celebrating each small success along the way.

As you continue to learn watercolor painting, you’ll not only improve your skills but also find a deeper appreciation for the beauty of this enchanting medium.

So grab your brushes, mix your colours, and let your creativity flow freely on the page!

Amazon.com do great starter art kits – everything you need to get started in one bundle. Click here to view.

Watercolor Techniques: Unlocking the Art of Fluid Creativity

Watercolor Techniques


Amazon.com do great starter art kits – everything you need to get started in one bundle. Click here to view.

Watercoloring is a captivating art form that has enchanted artists for centuries. With its ethereal transparency and endless possibilities, it allows both beginners and experienced painters to express their creativity in vibrant, flowing compositions.

Whether you’re just starting out with easy watercolor paintings or looking to refine your skills, understanding various watercolor techniques is essential to elevating your artistry.

Let’s explore different watercolor methods and discover how to master the watercolor painting method that suits your style.

The Beauty of Easy Watercolor Paintings

For many, watercoloring might seem intimidating at first, but starting with easy watercolor paintings can help build confidence. Simple subjects like flowers, sunsets, or abstract shapes allow you to focus on learning the basics without the pressure of creating a perfect masterpiece.

One of the first things to understand about watercolor is its fluidity. Unlike acrylics or oils, watercolors move unpredictably, blending and bleeding into one another, which can create stunning effects even in the simplest compositions.

Beginners are encouraged to experiment with wet-on-dry and wet-on-wet techniques. Wet-on-dry involves applying wet paint to dry paper, giving you more control and crisp edges. On the other hand, wet-on-wet is the practice of applying wet paint onto already damp paper, allowing colors to merge organically. These are foundational watercolor methods that open up a world of creative potential.

(The Figure in Watercolor: Simple, Fast, and Focused)

Essential Watercolor Methods to Master

  1. Layering (Glazing) Layering is a fundamental watercolor painting method where you build up transparent layers of color to achieve depth and richness. Start with light washes and gradually add darker tones as each layer dries. This technique works wonderfully for landscapes, portraits, and botanical illustrations, where subtle shading is key.
  2. Dry Brush Technique For those looking to add texture and detail, the dry brush technique is invaluable. By using a brush with very little water, you can create rough, scratchy strokes that resemble the texture of wood, grass, or fabric. It’s a great way to add contrast and tactile interest to your watercolor paintings.
  3. Salt Technique Sprinkling salt onto wet paint can create beautiful, crystalline patterns. As the salt absorbs the moisture, it pulls the pigment with it, resulting in a natural, textured effect that’s perfect for starry skies, snowy scenes, or abstract art. This watercolor method is a favorite among artists seeking a bit of surprise in their work.
  4. Lifting Lifting involves removing pigment from the paper to create highlights or correct mistakes. You can use a damp brush, sponge, or even tissue paper to blot out areas of color. This technique adds dimension and can help in creating realistic lighting effects in your paintings.
  5. Splattering If you’re aiming for a dynamic, energetic look, splattering is the way to go. Load your brush with pigment and tap it over your painting to create random, expressive dots of color. This is an excellent watercolor method for adding spontaneity and life to your artwork.

(168 Colors Premium Watercolor Paint Set, Equipped with Detail Paint Brush, Art Supplies, for Artists& Paiting Lovers)

Developing Your Personal Watercoloring Style

As you grow more familiar with these techniques, you’ll begin to develop a personal style that reflects your artistic vision.

The joy of watercoloring lies in its unpredictability — each brushstroke interacts with water and pigment in a unique way. Embrace the imperfections and let the medium guide you.

Often, the most enchanting results come from happy accidents.

Experimentation is key. Try combining techniques in a single piece — perhaps layering transparent washes over a salt-textured background, or adding fine dry-brush details to a loose, wet-on-wet landscape.

The possibilities are endless, and every experiment teaches you something new about this versatile medium.

(Watercolour for the Absolute Beginner: The Society for All Artists)

Conclusion

Watercoloring is more than just a painting method; it’s an adventure in creativity and expression. By starting with easy watercolor paintings and gradually exploring diverse watercolor methods, you can unlock the full potential of this beautiful art form.

Whether you’re layering delicate glazes, splattering bold colors, or lifting highlights to create depth, each technique brings you closer to mastering the watercolor painting method that resonates with you.

So grab your brushes, prepare your palette, and dive into the world of watercolor. Let the colors flow, and watch as your creativity comes to life on paper.

Amazon.com do great starter art kits – everything you need to get started in one bundle. Click here to view.

Oil Painting for Beginners: A Guide to Getting Started

Oil Painting for Beginners
Oil Painting for beginners

Amazon.com do great starter art kits – everything you need to get started in one bundle. Click here to view.

Oil painting is a timeless art form that has captivated artists for centuries. Its rich textures, vibrant colors, and versatility make it a popular choice for both amateur and professional artists.

If you’re new to the world of oil painting, it may seem daunting at first, but with the right approach, you can quickly grasp the basics and start creating beautiful artworks.

(Click Watercolor Painting for beginners for information on watercolor painting)

Let’s explore oil painting basics, how to learn oil painting, and we’ll provide tips for beginner oil pastel enthusiasts looking to transition to oil paints.

Understanding Oil Painting Basics

Oil painting is a medium that involves mixing pigments with oil, typically linseed oil, to create a paint that is rich in color and texture. The flexibility of oil paint allows you to work slowly, blending colors and building layers for detailed, luminous results.

One of the key benefits of oil painting is its slow drying time, which allows artists to make adjustments to their work even after hours or days of painting. This characteristic makes it ideal for artists who want to blend colors seamlessly or build up layers of paint gradually.

The oil painting process generally involves starting with an underpainting (a monochromatic sketch), followed by layering color from dark to light.

A technique called “fat over lean” is also essential in oil painting, meaning that each successive layer of paint should have more oil content to ensure proper drying and to avoid cracking.

(The Oil Painting Course You’ve Always Wanted: Guided Lessons for Beginners and Experienced Artists)

Choosing the Right Supplies for Beginners

If you’re just getting started with oil painting, having the right tools is essential. Here’s a list of basic supplies you’ll need for your first few projects:

  • Oil Paints: Start with a basic set of oil paints that includes primary colors (red, yellow, blue), along with white and black. These will allow you to mix a wide range of colors.
  • Brushes: You’ll need a variety of brushes, both flat and round, to work with different techniques. Synthetic brushes are a good starting point for beginners.
  • Canvas or Panel: You can choose between stretched canvas or canvas panels. For beginners, pre-stretched canvases are convenient and affordable.
  • Palette: A palette (usually a glass or wooden surface) is where you’ll mix your paints. A disposable palette pad is also an option for easy cleanup.
  • Solvents and Mediums: Turpentine or odorless mineral spirits will help thin the paint and clean brushes. Additionally, an oil painting medium (such as linseed oil) will help with paint consistency and drying time.
  • Rags or Paper Towels: These are necessary for wiping brushes and cleaning up spills.

(The Oil Painter’s Color Handbook: A Contemporary Guide to Color Mixing, Pigments, Palettes, and Harmony)

Learn Oil Painting: Getting Started

When learning oil painting, it’s important to take a step-by-step approach. Start by experimenting with basic techniques before moving on to more complex compositions. Here are a few tips for beginners:

  1. Start with Simple Subjects: As a beginner, it’s best to focus on simple still life setups or basic landscapes. These subjects provide an excellent opportunity to practice essential skills like mixing colors, creating value (light and dark), and mastering brushwork.
  2. Master Color Mixing: Oil painting allows for a wide range of colors, but knowing how to mix them properly is crucial. Start by learning how to mix primary colors to create secondary ones and understand how to create different values and shades of colors.
  3. Layering and Blending: Oil paint is great for blending because of its slow drying time. To create smooth transitions between colors, practice blending colors directly on the canvas. This can be especially useful in portraiture or landscapes.
  4. Use the Fat Over Lean Rule: One of the most important oil painting basics is the “fat over lean” rule. When painting in layers, make sure each new layer has more oil in it than the previous one. This ensures that your painting will dry properly and prevent cracking.
  5. Experiment with Brushwork: There’s no right or wrong way to hold a paintbrush. Experiment with different brushstrokes—whether it’s long, smooth strokes or short, choppy ones—and see how it affects the texture and appearance of your painting.

Beginner Oil Pastel Artists: Transitioning to Oil Paint

If you’re already familiar with beginner oil pastels, you may find that transitioning to oil paints is relatively easy. Both mediums share similarities in texture and blending abilities, but oil paints offer more flexibility and depth in their application.

However, there are a few key differences you’ll want to keep in mind when making the switch:

  1. Oil Paints Are Thinner: Unlike oil pastels, which can be applied directly from the stick, oil paints must be thinned with solvents or mixed with mediums for consistency. Be prepared to work with these additional materials to achieve the right texture.
  2. Layering: While oil pastels allow for layering, oil paints offer even more control over the thickness and smoothness of each layer. You’ll be able to build up a painting with more precision.
  3. Drying Time: Oil pastels don’t dry in the same way as oil paints, which dry slowly and may require days or even weeks to fully cure. Keep this in mind when working with oil paints, as it will affect how you approach your painting sessions.

(The Oil Painting Course You’ve Always Wanted: Guided Lessons for Beginners and Experienced Artists)

Oil Painting Made Easy: Practice and Patience

One of the most important things to remember when learning oil painting is that practice is key. Don’t be discouraged by early mistakes or imperfections—each painting will teach you something new. Whether you’re experimenting with oil pastel techniques or diving into more complex oil painting projects, take your time, enjoy the process, and be patient with yourself as you develop your skills.

Remember, there’s no rush to create a masterpiece right away. By focusing on the oil painting basics and gradually building your knowledge and technique, you’ll find that oil painting is not only enjoyable but deeply rewarding.

In conclusion, oil painting is a fantastic medium for both beginners and experienced artists alike. By understanding the basic materials, techniques, and working through challenges, you’ll soon be on your way to creating your own beautiful works of art. So, grab your brushes and start your oil painting journey today!

Amazon.com do great starter art kits – everything you need to get started in one bundle. Click here to view.